So, you’re ready to get Google Analytics on your website. Smart move. The whole process boils down to creating a GA4 account, getting your unique tracking ID, and then adding that snippet of code into your site's header. It sounds technical, but it’s actually pretty straightforward and opens the door to the kind of data that helps you actually grow your business.
Why You Absolutely Need to Connect Google Analytics
Before we jump into the how-to, let's talk about the why. Honestly, making business decisions without data is like driving with a blindfold on. You might be moving, but you have no idea where you're going. Google Analytics takes off the blindfold, giving you a crystal-clear picture of how people find your site and what they do once they get there.
Think about it for a second. Do you know which blog posts are your biggest traffic drivers? Or where your most valuable visitors are actually coming from? These aren't just fun facts; they are genuine, actionable insights.
Before we dive into the setup, it’s worth seeing the bigger picture.
| What You Gain by Installing Google Analytics |
| :— | :— |
| Benefit | What It Means For You |
| Uncover Audience Insights | Understand who your visitors are (age, location, interests) so you can tailor your content and marketing to what they actually care about. |
| Track the Full Customer Journey | See every click, scroll, and form submission to understand which paths lead to conversions and where users drop off. |
| Optimize Marketing Spend | Know exactly which channels (social media, organic search, ads) are sending you the best traffic, so you can double down on what works. |
| Improve User Experience | Identify which pages are confusing or causing users to leave, giving you a clear roadmap for website improvements. |
Connecting GA4 isn't just another task to check off your list—it's the foundation for making smarter, more profitable decisions for your business.
Uncover Actionable Audience Insights
Google Analytics goes way beyond just counting visitors. It digs into key demographics about your audience—their age, location, general interests, and more. This is gold for creating content and marketing campaigns that don't just shout into the void but actually connect with people. For any small business owner, this is how you stop wasting time and start reaching the right people.
For instance, you might discover that a huge chunk of your traffic comes from mobile users right here in Johnson City. Boom. Now you know to prioritize a killer mobile design and maybe create some local SEO content targeting that specific audience. For more ideas on that, feel free to explore our blog.
Key Takeaway: Google Analytics isn't about chasing vanity metrics like page views. It’s about deeply understanding user behavior so you can make data-backed decisions that drive real, sustainable growth.
Track What Truly Matters
The latest version, Google Analytics 4 (GA4), is built around an event-based model. In simple terms, this means it tracks specific interactions—like a button click, a video play, or a form submission—instead of just logging page views. This gives you a much richer, more complete story of the entire customer journey.
This is a pretty big deal. Since it first launched back in 2005, Google Analytics has grown to become the world's most popular analytics service. In fact, projections show that by 2025, nearly 38 million websites will be using it, which really tells you how essential it has become.
Of course, getting the platform installed is just the starting line. The real magic happens when you learn how to use Google Analytics to transform that raw data into a powerful strategic advantage for your business.
Getting Your GA4 Account and Property Set Up

Alright, let's get you on the board. Your whole data journey kicks off with a Google Analytics account. Think of this less as a simple login and more as the main filing cabinet for your business. It's the top-level organization, especially crucial if you're juggling multiple websites or apps.
You'll start by heading over to the Google Analytics homepage and signing in with your Google account. It's pretty straightforward.
The very first thing you'll be asked for is an Account Name. My advice? Keep it simple and use your business name. For example, "Swish Web Designs" or "Main Street Realty." This clarity pays off down the road when you might have several different sites to track under one roof.
Next, you'll see some data-sharing settings. Google asks if you want to share anonymous data to help them improve their products. For most people, just leaving the recommended settings checked is the way to go. It won't mess with your reports and helps the platform get better.
Creating Your First Property
With the account named, the next move is to create a Property. This is a really important concept to grasp. A Property is the specific website or app you want to track. If your business has a main website and, say, a separate mobile app, you’d set them up as two distinct properties, but they would both live under the same account.
Here’s where you’ll dial in the specifics for the site you're tracking:
- Property Name: Be descriptive here. I always recommend using the website's full name, like "SwishWebDesigns.com". No confusion that way.
- Reporting Time Zone: Pick the time zone where your business actually operates. This is key because it makes sure your daily reports line up with your business day. Otherwise, you'll see data splitting oddly across two days.
- Currency: Select the currency you do business in, such as USD for United States Dollars. This is absolutely vital if you plan on doing any e-commerce tracking later on.
Pro Tip: Getting the time zone and currency right from the very beginning is a non-negotiable for me. Yes, you can technically change them later, but doing so can create a mess with your historical data. Starting clean ensures your long-term trend analysis is built on a solid, consistent foundation.
Getting this set up is becoming standard practice for any serious business. By 2025, it's projected that 3.5 million websites in the U.S. alone will be on GA4. If you're interested in the numbers, you can discover insights about Google Analytics statistics here. It really shows how essential this tool has become.
Now that your property details are locked in, you're ready for the next step: getting that all-important tracking code.
Finding Your GA4 Measurement ID and Tag
Alright, now that you've created your property, Google has generated the unique tracking code that makes all the magic happen.
Think of it as your website's private phone number for Google Analytics. Without it, none of your data can phone home. Your very next move is to grab this code.
You'll need to poke around in your new property's settings to find the "Data Streams" section. This is where Google keeps the critical tracking info. Go ahead and click on your web data stream; this will pull up the two key pieces of information you’ll need to get Google Analytics hooked up to your site.
This is where you'll find both your Measurement ID and the Global Site Tag.
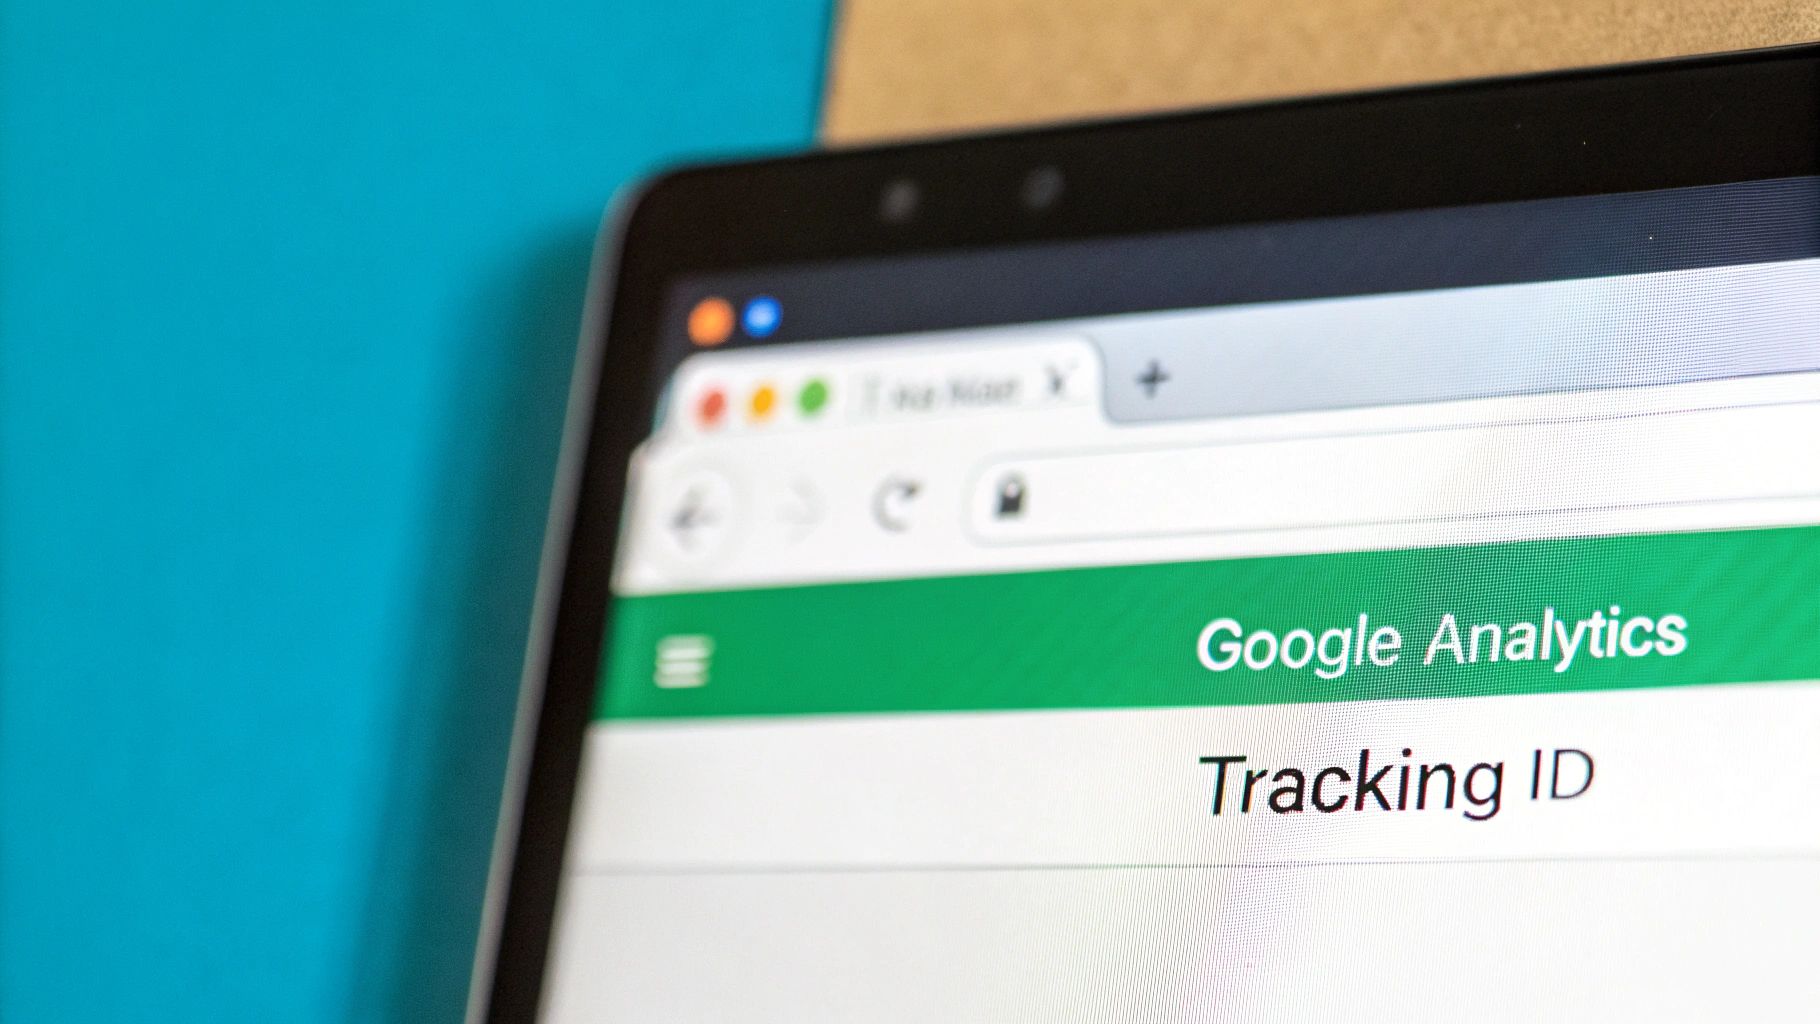
The screenshot above pinpoints the exact spot in your GA4 property where you can copy your Measurement ID and the full tracking code snippet. It’s pretty straightforward once you know where to look.
Your ID Versus Your Full Tag
You’ll immediately spot a prominent Measurement ID, which always kicks off with "G-" followed by a unique string of characters. For many modern website platforms and plugins—think WordPress, Shopify, or Squarespace—this is all you'll need. They have a dedicated field where you just copy and paste this ID. Simple.
But for a manual installation or if you're doing any custom work, you'll need the whole enchilada: the full code snippet, which is known as the Global Site Tag (gtag.js). This is a small block of JavaScript that has to be placed within the <head> section of your website’s HTML code.
Here’s the deal: The Measurement ID is just a simple identifier. The Global Site Tag is the actual script that does the heavy lifting of tracking. If your website builder or a plugin only asks for the ID, it's because it already has the script built in and just needs your unique ID to link up with your account.
For a deeper dive on tracking down your specific ID, this guide on the Google Analytics Measurement ID is a great resource.
Knowing which one to use is half the battle. If you're using a plugin or a built-in integration, grab the ID. If you're getting your hands dirty with code, you'll need the full tag.
Right, so you've got your new GA4 tag ready to go. Now for the most important bit: getting it onto your website so it can actually start pulling in data.
How you tackle this really comes down to your website's setup and how comfortable you are with poking around in code. Don't worry, there's a straightforward path for pretty much everyone.
Getting Hands-On: The Manual Install
For anyone with a custom-coded site or those who just prefer direct control, the manual method is your best bet. This means you'll be grabbing the full Global Site Tag (gtag.js) script and pasting it directly into your site’s HTML.
The one non-negotiable rule here? The code has to live inside the <head> section on every single page of your site. The most efficient way to do this is to pop it into a global header file or template. That way, you add it once, and it’s active everywhere.
This basic flow—generate, insert, verify—is the universal game plan for getting analytics up and running.
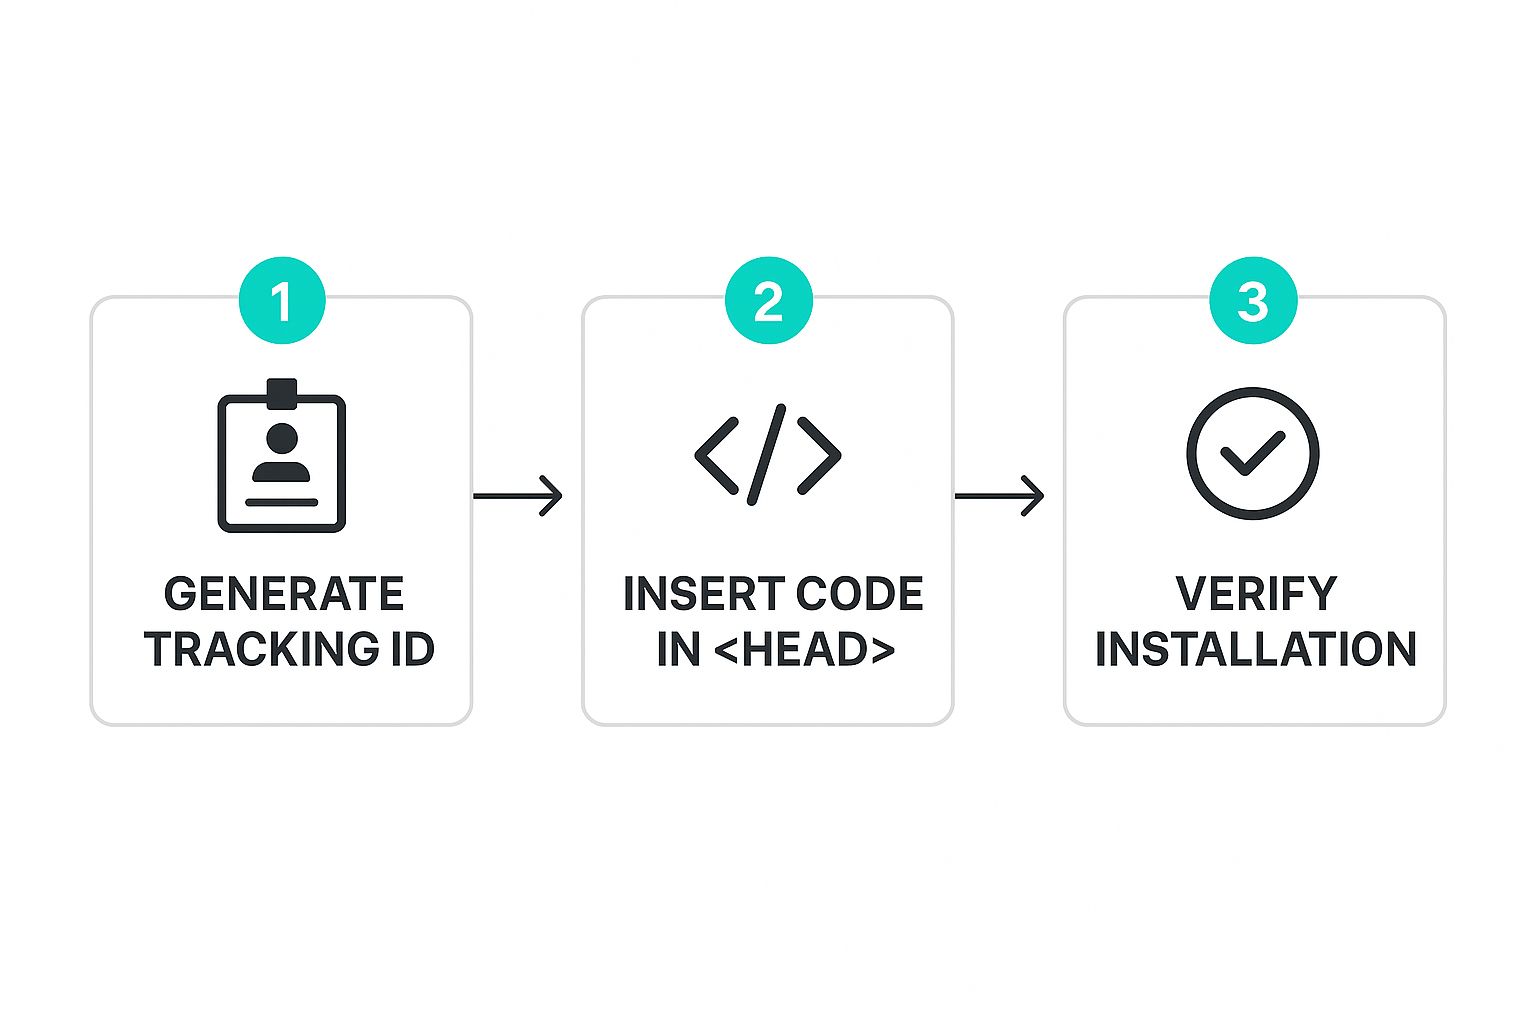
The image above really boils down the whole process into three core actions. It’s a great mental map to keep in mind, no matter which platform you're using.
The Easy Way: Platform-Specific Guides
If you're not keen on editing HTML files directly, you're in luck. Most modern website builders and CMS platforms make this a whole lot simpler. Instead of the entire code snippet, they provide a dedicated field where you just need to paste your Measurement ID (that's the one that starts with "G-").
Here’s a quick look at how it works on some of the most popular platforms:
- WordPress: The simplest route by far is to use a trusted plugin. Tools like GA Google Analytics or Google's own Site Kit are excellent. Just install your chosen plugin, find its settings, and paste your Measurement ID into the designated field. The plugin handles the rest.
- Shopify: From your Shopify admin dashboard, head to Online Store > Preferences. You'll see a "Google Analytics" section waiting for you. Paste your GA4 Measurement ID there, and you're all set.
- Squarespace: In your site's backend, navigate over to Settings > Advanced > External API Keys. Squarespace gives you a specific field labeled "Google Analytics" just for your Measurement ID.
My Personal Tip: Unless you have a very specific reason to get into the code, always lean on the platform's built-in integration or a well-regarded plugin. These tools are built to place the tracking script correctly without any risk of you accidentally breaking your site’s layout or functionality. For more complex sites, professional website development can ensure all scripts are implemented flawlessly from the get-go.
Comparing GA4 Installation Methods
Feeling a bit stuck on which path is right for you? This table should help clear things up. It breaks down the main installation methods, who they're best for, and the key pros and cons of each.
| Installation Method | Best For | Pros | Cons |
|---|---|---|---|
| Manual (gtag.js) | Custom-coded websites, developers wanting full control. | Complete control over script placement and customization. | Higher risk of errors; requires technical knowledge. |
| CMS/Platform Integration | Users on platforms like Shopify, Squarespace, Wix. | Extremely simple, fast, and low-risk. | Less control over advanced tracking configurations. |
| Plugin (e.g., WordPress) | WordPress users of all skill levels. | Easy setup, often includes extra features and reporting. | Adds another plugin to manage; potential for conflicts. |
| Google Tag Manager | Marketers needing to manage multiple tracking tags. | The most flexible and powerful method for complex tracking. | Steeper learning curve; can be overkill for simple sites. |
Ultimately, the goal is the same regardless of the method you choose. Just pick the one that aligns with your site and your skills to get that tag active and start collecting data.
Why This Step Is So Crucial
Adding a tracking code like this has become a fundamental part of launching and managing any serious website. It's standard practice now because the insights you gain are simply invaluable for any business trying to understand its audience and grow its online presence.
In fact, this process is so common that an estimated 83.5% of all websites use Google Analytics or a similar tool to monitor their performance. If you're curious, you can explore more detailed Google Analytics adoption statistics to see just how widespread it is. This really highlights how essential this data has become for making smart, informed decisions.
No matter which installation route you take, the goal is always the same: get that tag firing so you can finally see what’s happening on your site. Once it's in place, you’re ready for the final verification step.
Verifying Your Installation Is Working Correctly

You've got the code installed—now for the moment of truth. How can you be absolutely sure you’ve added Google Analytics to your site correctly? This is where you get that instant confirmation that data is flowing exactly as it should be.
My go-to method, and the quickest way to put your mind at ease, is using the Realtime report. This live dashboard is your best friend right after an installation.
Just log into your Google Analytics account and find your way to Reports > Realtime. Next, open your own website in a new browser tab or on your phone. Within a minute or so, you should see your own visit pop up in the report, showing at least 1 user active on your site. Seeing that little number flip from 0 to 1 is the ultimate proof that you're connected and ready to go.
Troubleshooting Common Issues
Don't see any activity? Don't panic. This is a common hiccup, and from my experience, it's usually a surprisingly easy fix. A few simple checks will resolve the vast majority of installation problems.
Before you start digging deep into code, let's tackle the most likely culprits first:
- Check for Typos: Go back and double-check that you copied the full Measurement ID (which looks like G-XXXXXXX) or the entire script without any extra characters or missing pieces. One tiny typo is all it takes to break the connection.
- Clear Your Cache: It's very possible your website is serving up an old, cached version of itself—one without the new Analytics script. Try clearing your website’s cache (usually through a plugin or your hosting provider) and your browser's cache, then visit your site again.
- Confirm Script Placement: If you went the manual install route, make sure the code is nestled inside the
<head>section of your site’s HTML. Placing it in the<body>by mistake is a frequent cause for it not to work.
Key Insight: Remember that comprehensive reports, like traffic acquisition, can take 24-48 hours to start populating with data. The Realtime report is purely for that immediate, "is it on?" verification, so don't sweat it if your other reports look empty at first.
Once you’re verified, your journey into data has officially begun! You can start exploring key reports and setting simple goals, like keeping an eye on your top traffic sources for the week. Regular health checks are a key part of good site management, something we cover in more detail in our website maintenance checklist.
Got Questions About Your GA4 Setup?
It's totally normal for a few questions to pop up when you're getting Google Analytics hooked up to your website for the first time. Let's tackle some of the most common ones I hear from clients so you can move forward with confidence.
How Quickly Will I See Data?
You should see activity in the 'Realtime' report almost instantly—within minutes of getting the tracking code installed correctly. This is actually the best way to double-check that everything is working as it should.
However, for the more detailed reports, like audience demographics and where your traffic is coming from, you'll need a little patience. Those can take a full 24-48 hours to process and start showing new data.
Is Google Analytics Free to Use?
Yes, the standard version of Google Analytics 4 (GA4) is completely free. It’s incredibly powerful and has more than enough features for the vast majority of businesses, from solo bloggers to pretty large e-commerce sites.
There is a paid, enterprise-level version called Google Analytics 360, but it’s really built for massive corporations with truly enormous data processing needs. For most of us, the free version is all you'll ever need.
Expert Take: The biggest shift from the old Universal Analytics (UA) to GA4 is the data model. UA was all about 'sessions,' which meant it grouped all of a user's interactions into a single visit. GA4 is 'event-based,' treating every single interaction—a page view, a button click, a scroll—as its own separate event. This gives you a much more granular and flexible view of the entire customer journey.
Do I Really Need the Code on Every Single Page?
Absolutely, yes. For tracking to be complete and accurate, the GA4 tag (the gtag.js script) has to be on every single page of your site.
The good news is that most modern setups handle this for you automatically. If you're using a WordPress plugin or adding the code through a theme editor like Shopify's, it will place the tag in a global header that loads everywhere. If you’re one of the brave souls adding it manually, just make sure that script is in a header file that's included across your entire site.
Ready to stop wrestling with technical details and get back to what you do best? Swish Web Designs provides complete, stress-free website management. We cover everything from expert design and development to secure hosting and local SEO, letting you focus on running your business. Learn more about our services.


